Honest Product Review: italki
I truly believe that italki is one of the best tools to learn Spanish (or any language) available on the internet. Not only does it offer you lots of free functions, it makes hiring a professional teacher simple and effective.
Not into spending money to learn Spanish? Here’s why that is a bad idea.
However, I do understand some people may not want to or be able to spend any money at the moment.
So this FREE tutorial walks you through everything you need to know to get started using italki to learn Spanish, whether you want only the free Italki functions or are ready to begin online classes with one-on-one teachers.
I know this is a long article but if you follow the steps here, you will be learning Spanish by the end of this page.
Don’t waste any more time. Start Spanish Today.
– Jared Romey

Italki Review: Learn Spanish Online With italki
WHAT IS ITALKI?
Italki is a powerful language learning tool and is one of the first tools you should become comfortable using as you START SPANISH TODAY. At first glance, it appears to be a way to hire teachers and find language partners. While this is indeed a major part of Italki, there are other important components and uses. By the end of this tutorial you will learn all about Italki and become comfortable with it over the next several days. You will find that at the end of this module, Italki will be an important tool in your Spanish learning resource toolbox. (Don’t forget to bookmark this page so you can refer back to it quickly in the future.)
WHY ITALKI?
I like Italki for several reasons. First and foremost, Italki is one of the most versatile language learning tools you will find. Read more about how versatile Italki can be with How To Use Italki To Learn Real World Spanish and Italki for children to see some of the many ways you can use Italki.
Italki brings the Spanish world closer to you. You meet and learn from real people around the Spanish speaking world. You can even reach out to people from a specific region or country, in case you plan on having more contact with that area. This is important for learning the “local” version of Spanish for that area.
Italki also happens to be an extremely economical way to find Spanish teachers. Many of them cost less than half of what it would cost to find a teacher in your city or town and work with them. Plus, there’s also the benefit of not having to leave your home to meet with the teacher. That can save you time and gas or transportation costs.
Another benefit is that you can practice all four parts of Spanish learning: speaking, listening, reading and writing.
Also at Speaking Latino we promote Real World Spanish – the Spanish that you will use and hear out in the real world. Unfortunately, many tools that exist do not teach you how to communicate with others. Instead they focus on the “academic” version of Spanish.
For these reasons we believe Italki to be an extremely powerful tool.
Let’s get started using Italki.
Italki Tutorial:
A Guide to Take Action to Start Spanish Today With italki
1. Create an Account
Head to Italki and create an account. You have the option of signing up with your Facebook account, or with your email and password. Either option is fine, although signing in with Facebook will be slightly quicker.
When you create an account and log in for the first time you should take a few minutes to answer the questions presented to you by Italki about your language interests and background. This is useful for reaching out to people with common interests, and Italki even customizes some of your options based on this.
Also, be sure to confirm your sign-up with the email that Italki will send to you when you create your account.
2. Follow me and Diana on Italki and send requests for us to follow you.
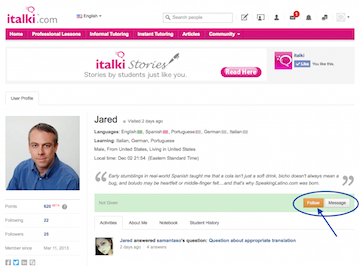
An important component of Italki is the social interaction with other language learners. It is easier to learn Spanish when you have other people to help you along. Following others is a way to reach out to people to start a conversation. You may find a new conversation partner, a teacher or even just a friend. So follow both of us. That way you can easily ask us questions when you get stuck on something. Here is what the follow button looks like:
 |
 |
 |
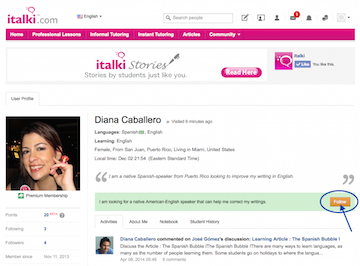 |
Once you hit the follow button, a window will open automatically to send us a message to follow you. Send us that message! We will follow you back.
3. Fill out the information about your profile including the languages you are learning and your levels.
This is the place to tell people about yourself. A few of the items you may want to share to the italki community are:
• Why you are learning Spanish.
• The specific region or country that interests you and why.
• Your personal interests that you would like to discuss with your language partners.
Be sure to also upload a photo of yourself if one has not been pulled from Facebook.
4. Confirm you installed Skype
PLEASE NOTE: There has been some confusion about the following: Skype or a similar program is required for the best italki tools for language exchange and tutoring, however, SKYPE IS NOT REQUIRED to use many italki functions. Also, IT IS NOT NECESSARY TO SPEND MONEY to use italki, however, the private tutoring requires spending money. If you are not sure about either, ASK ME.
This one’s easy. You have Skype installed, right? If not, now’s the time to do it. If you need directions, here is a Youtube video on installing skype and setting up an account.
It is important to repeat that using Skype is not required with Italki however it does significantly enhance your experience. Skype is required if you plan on purchasing private Spanish lessons.
Glance at the Italki dashboard and notice how there are different menu options as well as different sections on the page. If you have a few minutes, try one of the suggested activities in the light green box in the middle of the page, near the top. For example:

Note the arrows on the lower right of this box. If you click an arrow the box will scroll to a different action. You can try as many actions as your time allows.
5. Become familiar with the main sections of the Italki home-dashboard page.
Before you start, make sure you are logged in to Italki.
This section is an overview of the Italki dashboard page, which is the Italki home page where you can start anything on Italki.
A. The first section is the MAIN MENU:
![]()
B. The second section of the Italki dashboard is the ADMINISTRATIVE MENU on the upper right of your screen:
![]()
C. After that comes the Italki MAIN BODY which is everything below the fuschia menu scrolling down to the footer.
The main body of the Italki dashboard is mostly a series of shortcuts for moving around the website. Most of these options are found in the two menus described above. Once you are familiar with Italki, you will recognize many of these options and can use them instead of the menus, however, for the moment, let’s stick with the menus.
D. Finally, at the bottom is the FOOTER, which offers you more shortcuts on learning a specific language (LEARN A LANGUAGE), moving around the Italki site (BROWSE) or finding more help and information about italki (GET HELP):
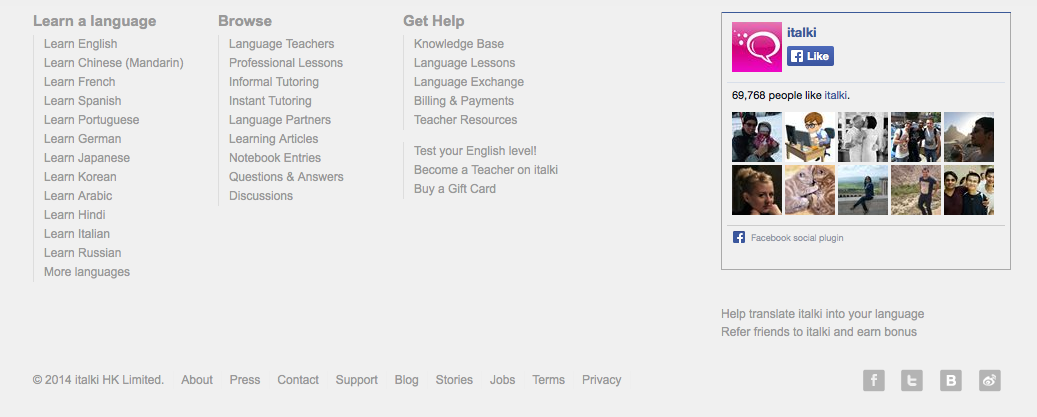
These are the four main sections on the Italki website.
5.1. Explore the MAIN MENU.
Let’s head back to the MAIN MENU for a moment:
![]()
Here you can find the HOME option which allows you to head back to the home page at any time.
Then the next 2 options are related to finding paid teachers (we cover these in more detail down below): PROFESSIONAL LESSONS or INFORMAL TUTORING (INSTANT TUTORING is no longer an option available). These options are one of the core functions of Italki, namely to connect you with qualified professionals who can help you learn Spanish.
The ARTICLES option is the blog for Italki where people write articles about language learning. The articles about Spanish are available here.
Finally, you have the COMMUNITY option, which we cover in detail below. This is where you will meet and interact with other language learners around the world.
5.2. Explore the upper right ADMINISTRATIVE MENU.
The next section of the Italki dashboard is the upper right ADMINISTRATIVE MENU:
![]()
A. Going from left to right, the first option is a Search Box. option to find other people. If you know a friend is on Italki you can search for them here. You may also just ask the person to send you their user name or Italki URL.
B. The next option is Post represented by the box with the pencil here:
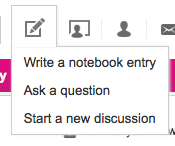
This icon gives you three different options to write and post your thoughts to Italki. All three of these options also exist under the main menu COMMUNITY, so the options here are just a shortcut.
C. The next option in the admin menu is the box with the person. It is called Sessions and includes 4 options:
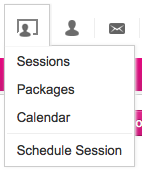
These are also shortcut buttons and all these options are related to managing and signing up for paid classes with teachers, discussed in a coming lesson.
D. Following that is the Friends option and is represented by an icon of a person:
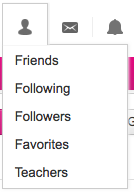
This option is where you can look at the lists of your friends, followers or teachers, and reach out to any person.
E. The envelope icon is where you can create and respond to any messages sent to you within italki. Messages in Italki are just your private e-mails with other people.
F. After the envelope is the bell icon which is your notifications. If you have any responses to your posts, comments or other interactions on Italki, they will appear here.
G. The next-to-last icon is two stacks of coins called Finance and is where you manage your account balance you use to pay teachers for your classes:
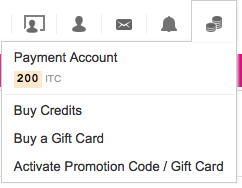
H. Finally, on the far right, is the area where you manage your profile and account. If you have uploaded a photo for your biography, it appears here, as do a couple options related to your profile and settings:
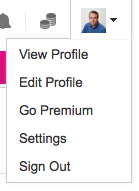
 I suggest you fill out your full profile as it is a great tool to meet language partners. However, at a minimum I suggest you fill out the Quick User Introduction, your Local Time and the Languages you know and learn. These three items will help improve your Italki experience significantly.
Italki Tutorial:
Taking Advantage of the Free italki Features to Learn Spanish
The following steps focus on one portion of the main menu, the Community option, which is the last option, of the Fuschia menu on the far right.

This menu choice is important because it is where a large portion of your free learning options begin on italki. There are four options available within the Community option and each is discussed below.
6. Write an entry in your notebook
Heading back to the Community menu option on the Italki main menu, select the NOTEBOOK option within the Community drop-down menu. If you don’t see the Italki main menu, then just go back to the italki home page.
Once you select the NOTEBOOK option, you should see this on the page:

On the left of this box, select Write a Notebook Entry.
Your notebook is to write whatever you would like about your Spanish journey. You can write about being stuck on something, a milestone you reached, or anything else you would like to share.
Other people can see this entry and you can look at other peoples’ entries. Even more importantly, other people can correct your entries for you, so once you begin writing in Spanish watch other people correct your Spanish and help you learn.
Try creating a simple sentence in Spanish for you to post and see what happens. Or you can copy this phrase (which is not written 100% correct) to see how others react.
“Yo querer aprender español por poder viajar el mundo.”
Now any time you would like to share an idea or write in Spanish, you know where.
7. Answer a question for the community
Continuing within the Community menu option, select the third option Answers. You will see this box again:

Right below that you will see this list of languages or something similar (the list is customized based on the languages in your profile):
Select English and skim through the topics to find one that you think you can help the person by answering. It’s okay if there is already an answer. Often, people have different perceptions or experiences so feel free to share your opinion while you answer. Be sure to answer truthfully, or mention if it is only an opinion. Remember, other people will use this to further their understanding of English.
You just walked through the steps of helping others and learning from them about Spanish!
NOTE: We skipped the last option, Discussion, in the Community menu button since it is so similar to Notebook and Answers. Here, people post cultural questions or general questions they have while Notebook posts are written texts to be corrected and Asking a Question is most often about grammar, vocabulary or a clarification about some specific language point. Feel free to check it out the Discussion option on your own.
8. Ask a question to the community
This is a fundamental skill to learn with Italki and is similar to writing in your notebook or answering a question for someone else. This option, also found in the Community menu option, under Answers allows you to ask Spanish speakers questions about their language. If you are stuck with something or can’t understand the difference between words, this is the place to ask. In my experience, you will often receive a response within 60 minutes.

The great thing about Asking a question is that you will often receive several responses so you can consider what each person says and learn from everyone.
So, time to ask your first question. Just enter your question into the above box and then publish it with the “Ask a Question” button.
You can either create your own question, or borrow ours below:
“How different is Spanish from one country to another? Does the vocabulary, grammar or pronunciation change?”
Now check back occasionally to see what answers you receive. You can comment on answers to ask for more information, a clarification or even just to say thank you.
9. Find a language partner
In this step you learn how to use one of the most important free functions of Italki: how to meet people around the world. These people you can easily meet can become langauge partners who help you practice to achieve your Spanish language goals. This is an important part of both italki and learning Spanish. A language partner is a great way ask questions about anything you need help with, learn from real people, find out more about the culture and what life is like as well. And a great thing about this is that you can tailor your learning needs to the region or country that most interests you.
Language partners have a cost though, but not in money. The cost is that your language partners will expect that you help them with English. So your cost is time. You should plan on spending at least as much time helping them learn English, as you spend with them learning Spanish.
As you begin your language journey, focus on learning about the people and culture before you begin learning the language.
And remember one important thing, most language partners are not teachers so just like you may not be able to explain the rules for using different verb tenses (or even know verb tense names), your partner might not be able to explain those items in Spanish. Just work with your partner talking about their life, their culture and their interests.
Start here to find a language partner. Under the Community menu option on Italki, select Language Partners (the first option within Community).
You will see this screen:
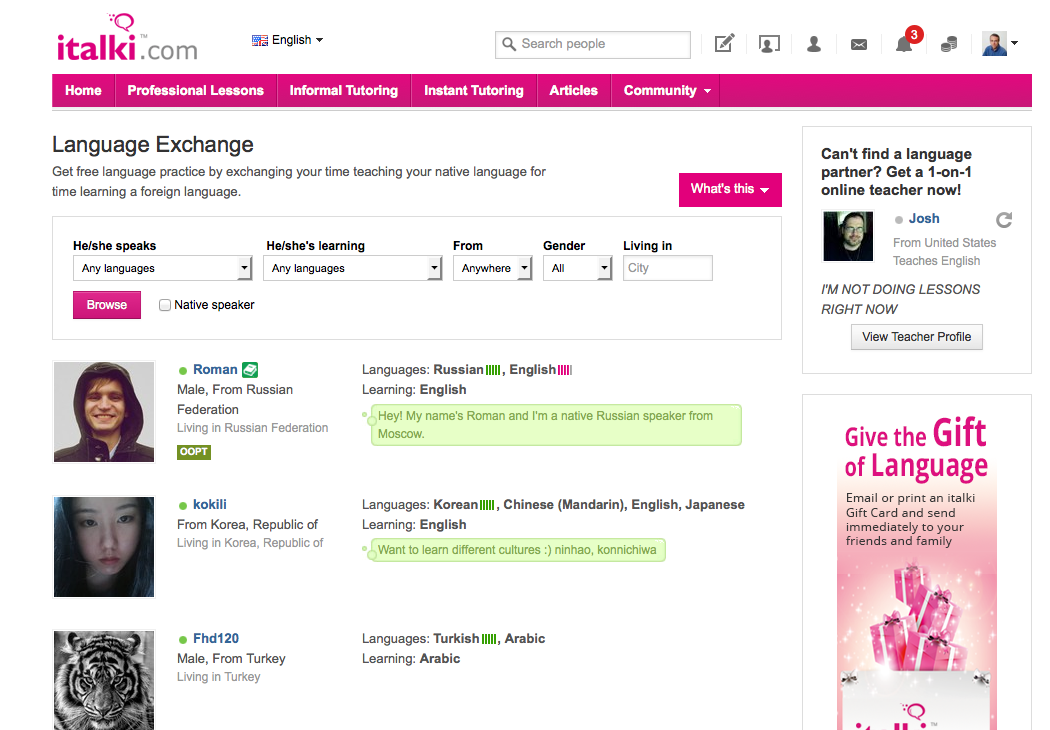
From here, you can browse people to meet, or filter through more people using the menu options:

 I like to look for native speakers of Spanish and I sometimes choose speakers from a specific country if I’m interested in learning more about that country.
To find only native speakers be sure to check this box next to the pink/fuchsia BROWSE button:
![]()
Once you narrow your search options with the filter, look for someone who is online right now, if available. You can tell because of the little green circle (like the green of a traffic light), next to the person’s name (see examples below).
Here are a few examples:
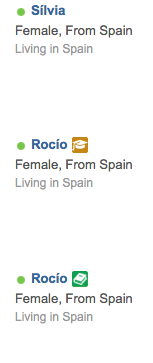
When you identify a person to reach out to, click on their photo or name and hit follow (remember you did this when you followed me and Diana). IMPORTANT: Spend a minute to write a unique message mentioning that you are just starting to learn about Spanish and would like to learn more about the person’s culture and language. You should also mention that you can help with their English too. This is much more interesting and effective than using the generic Italki text that appears automatically.
This step to follow others is important since you must both follow each other to then use italki’s chat option. Without following others and them accepting, you cannot start the conversation to find language partners. This is also why a unique message is important; it is more likely people will accept your Follow request.
10. Schedule or have a conversation with a partner
After you have both accepted the Follow requests and exchanged a few messages (if both of you are online and writing, this is almost instantaneous), you can suggest moving to Skype where you both can talk and see each other. It is not possible to speak with or see someone through video within Italki, so Skype (or any similar program) is needed to continue a conversation.
Since not everyone will respond to your Follow requests, it may take a few tries to find someone right away to chat with however, you will most likely find someone quickly. As a Spanish beginner, it is best if you find someone who can already communicate in English. This allows you to help them, and still be able to communicate. They can then teach you some Spanish basics.
And don’t forget to help them learn English!
Italki Tutorial:
Maximazing Professional Teacher Hiring
This next section is long, yet important. If you need to break it into parts, please do. These steps walk you through the basics of finding an Italki teacher that fits with your schedule and needs, based on the three types of tutor sessions available. You will also learn about putting money into your account and how to set up a trial session.
NOTE: Before you schedule a session, we suggest you read through this whole section, so you know about all the options available to you.
11. Learn about the types of tutoring available on Italki:
The three types of tutoring available on Italki are:
1. Professional Lessons
2. Informal Tutoring
Each of the options has it’s benefits and downsides. Also, generally, the cost varies for each type of tutoring. The most expensive is the professional lesson, while informal tutoring will often be cheaper.
PROFESSIONAL LESSONS
Professional lessons are the most structured of the three learning options. Teachers will often have a specific lesson plan or curriculum developed that they can adapt to your specific needs. They will also have professional degrees and certificates. In Professional lessons, the teacher will design and structure the lesson.
INFORMAL TUTORING
Informal tutoring will be less structured than the Professional Lessons in many cases. Often, informal sessions will cost less than the professional sessions, however this is not always the case.
These lessons are great for speaking practice, supplementing other classes or tools you are using to learn Spanish, or even to help with homework, learn about the culture, or learn more about a specific country’s vocabulary.
12. Learn About Trial Sessions.
Trial sessions are an interesting feature of Italki. They allow you to become more comfortable with how Italki works when you first start using the site.
You are assigned 3 trial sessions when you create your account, which you may use at any time. The sessions never expire, however, you also never receive more than 3 sessions, so once you use them, they will never appear again.
The trial sessions walk you through the process of paying for credits (more on credits below), how to schedule a session, and what to do after the session ends.
Trial sessions are often, but not always, at discounted rates.
Also, not all teachers offer trial sessions.
When you search for teachers, the results show you which teachers offer trial sessions. Just look for the green box at the right of the teacher’s profile, in the search results, as seen here:
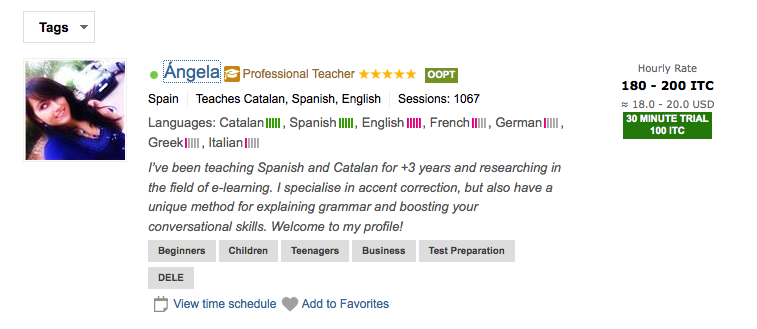
To set up a trial session, click on the teacher’s name and when you are on his/her profile page, select SCHEDULE A SESSION. From there, scroll down until you see “30 minute trial session”. Select it and follow the prompts from there.
13. Learn about ITC and paying for classes. [OPTIONAL]
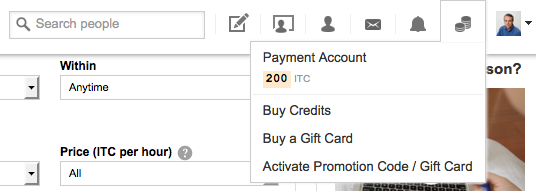
ITC stands for Italki credit and is the “currency” used in Italki to pay for your classes, as well as other services on Italki. 10 ITC is equal to 1 US Dollar. These credits may be purchased for your account using a credit card or with Paypal.
To purchase credits, look for the stacked coins in the upper right menu on the Italki page. Click on the coins and you will see the option to Buy Credits (as seen below). Select that, and follow the instructions to purchase credits.
14. Search for a Teacher.
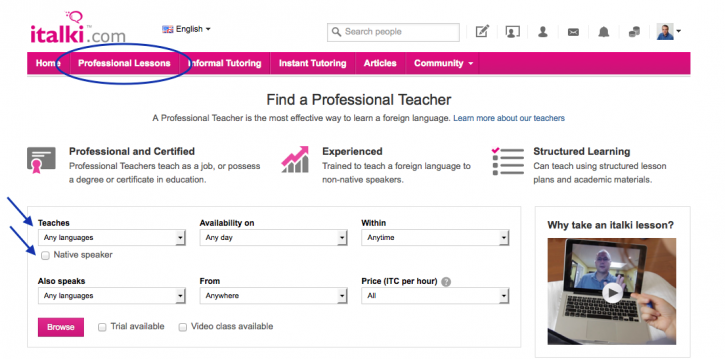
You should first search for teachers who teach Spanish by entering Spanish in the TEACHES dropdown menu (see the first blue arrow in the image below).

I always also prefer to search only for native teachers, which you can search for by checking on this small box (also seen with the second blue arrow in the image above):
![]()
Once you have entered in all the variables in the options, hit BROWSE and you will have your list of Spanish teachers. You should go through the list to learn more about each teacher, to help you decide which one to select for your first session. Remember, this is a process that in part will be trial-and-error, so don’t worry too much about your decision.
You can even send a message back and forth to ask any questions you may have to help you decide. Just select the CONTACT TEACHER button shown here:

15. How to select a teacher.
Before reading this section, take a look at this article on 10 Things To Keep In Mind When Selecting An Italki Teacher.
When looking for a teacher, the best thing to do is to read through the person’s profile. You can arrive there by clicking on the person’s name. On the teacher’s profile page you can find the following (as well as more information):
• The teacher’s introduction video
• The teacher’s experience on Italki
• The types of sessions the teacher has available
• The teacher’s available hours
• Specific specialties the teacher mentions (ex. pronunciation, kids, grammar, teaching about food, etc.), for example:

• The levels he/she teaches
• The country the teacher is from. This will really only be important if you want to learn Spanish from a specific country.
• The rates the teacher charges
• The “About Me” description
• The Student Feedback tab (you need to click on it, halfway down the page, pictured below)
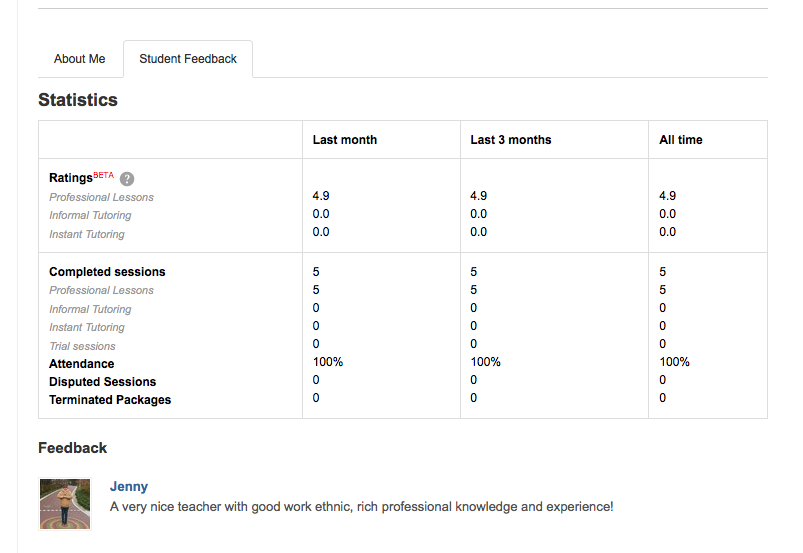
All of these items may be important to making your decision if the teacher is right for you.
Remember, don’t get stuck on finding the perfect teacher. Choose someone and start today.
16. Sign up for a 30 minute trial class.
Now’s the chance for you to take action.
Search for a Spanish teacher, selecting one that offers the 30 minute trial sessions. Select Schedule A Session, and then choose a 30 Minute Trial Session and you can walk through the process for your first online one-on-one class.
Remember, this is more about understanding Italki and starting a habit to learn Spanish, and less about using these 30 minutes to study with a teacher. Spend the time explaining to the teacher your reasons for learning Spanish as well as your available time in the coming months. Can you dedicate 7 hours a day….or is it 30 minutes a week? It’s important to share this information since it will help your teacher to work with you. Also, keep in mind, you are evaluating this teacher to see if he/she can offer you what you need to learn Spanish as you take more classes.
If you are ready to do a class now, then search for a teacher in the instant tutor options instead.
¡Felicitaciones! You scheduled your first class and now can use italki, one of the best online learning tools for Spanish.


